If you receive an error message stating that "The printer was unable to detect or read the alignment page" (Figure 1), this may indicate that the printer is not properly recognizing the cartridge.

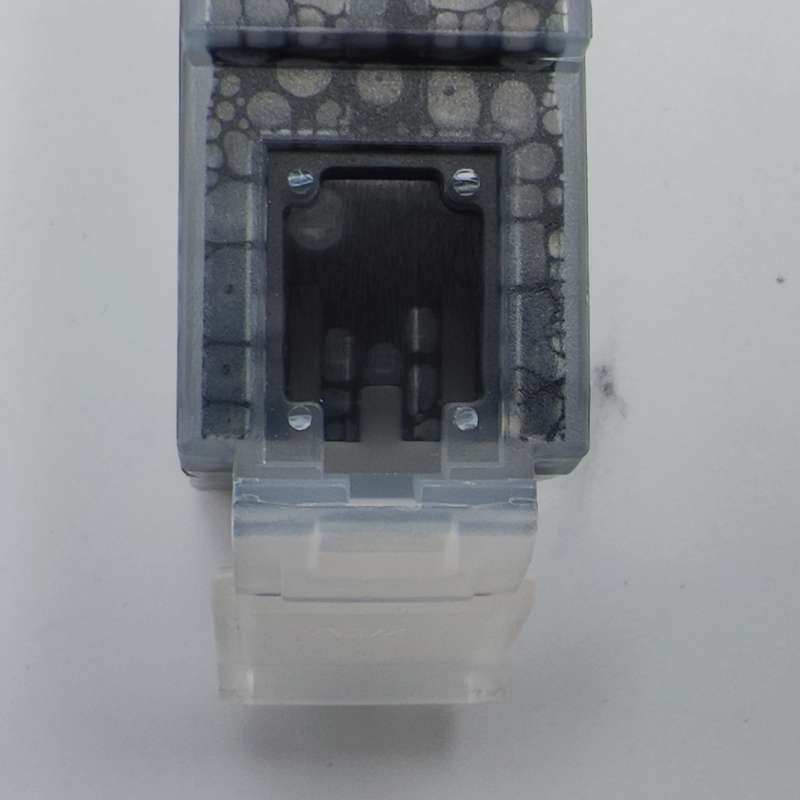
Remove the cartridge from the printer and locate the chip. Make sure the chip is in place (Figure 2). Please remove any obstruction or debris as this may prevent the alignment from completing.
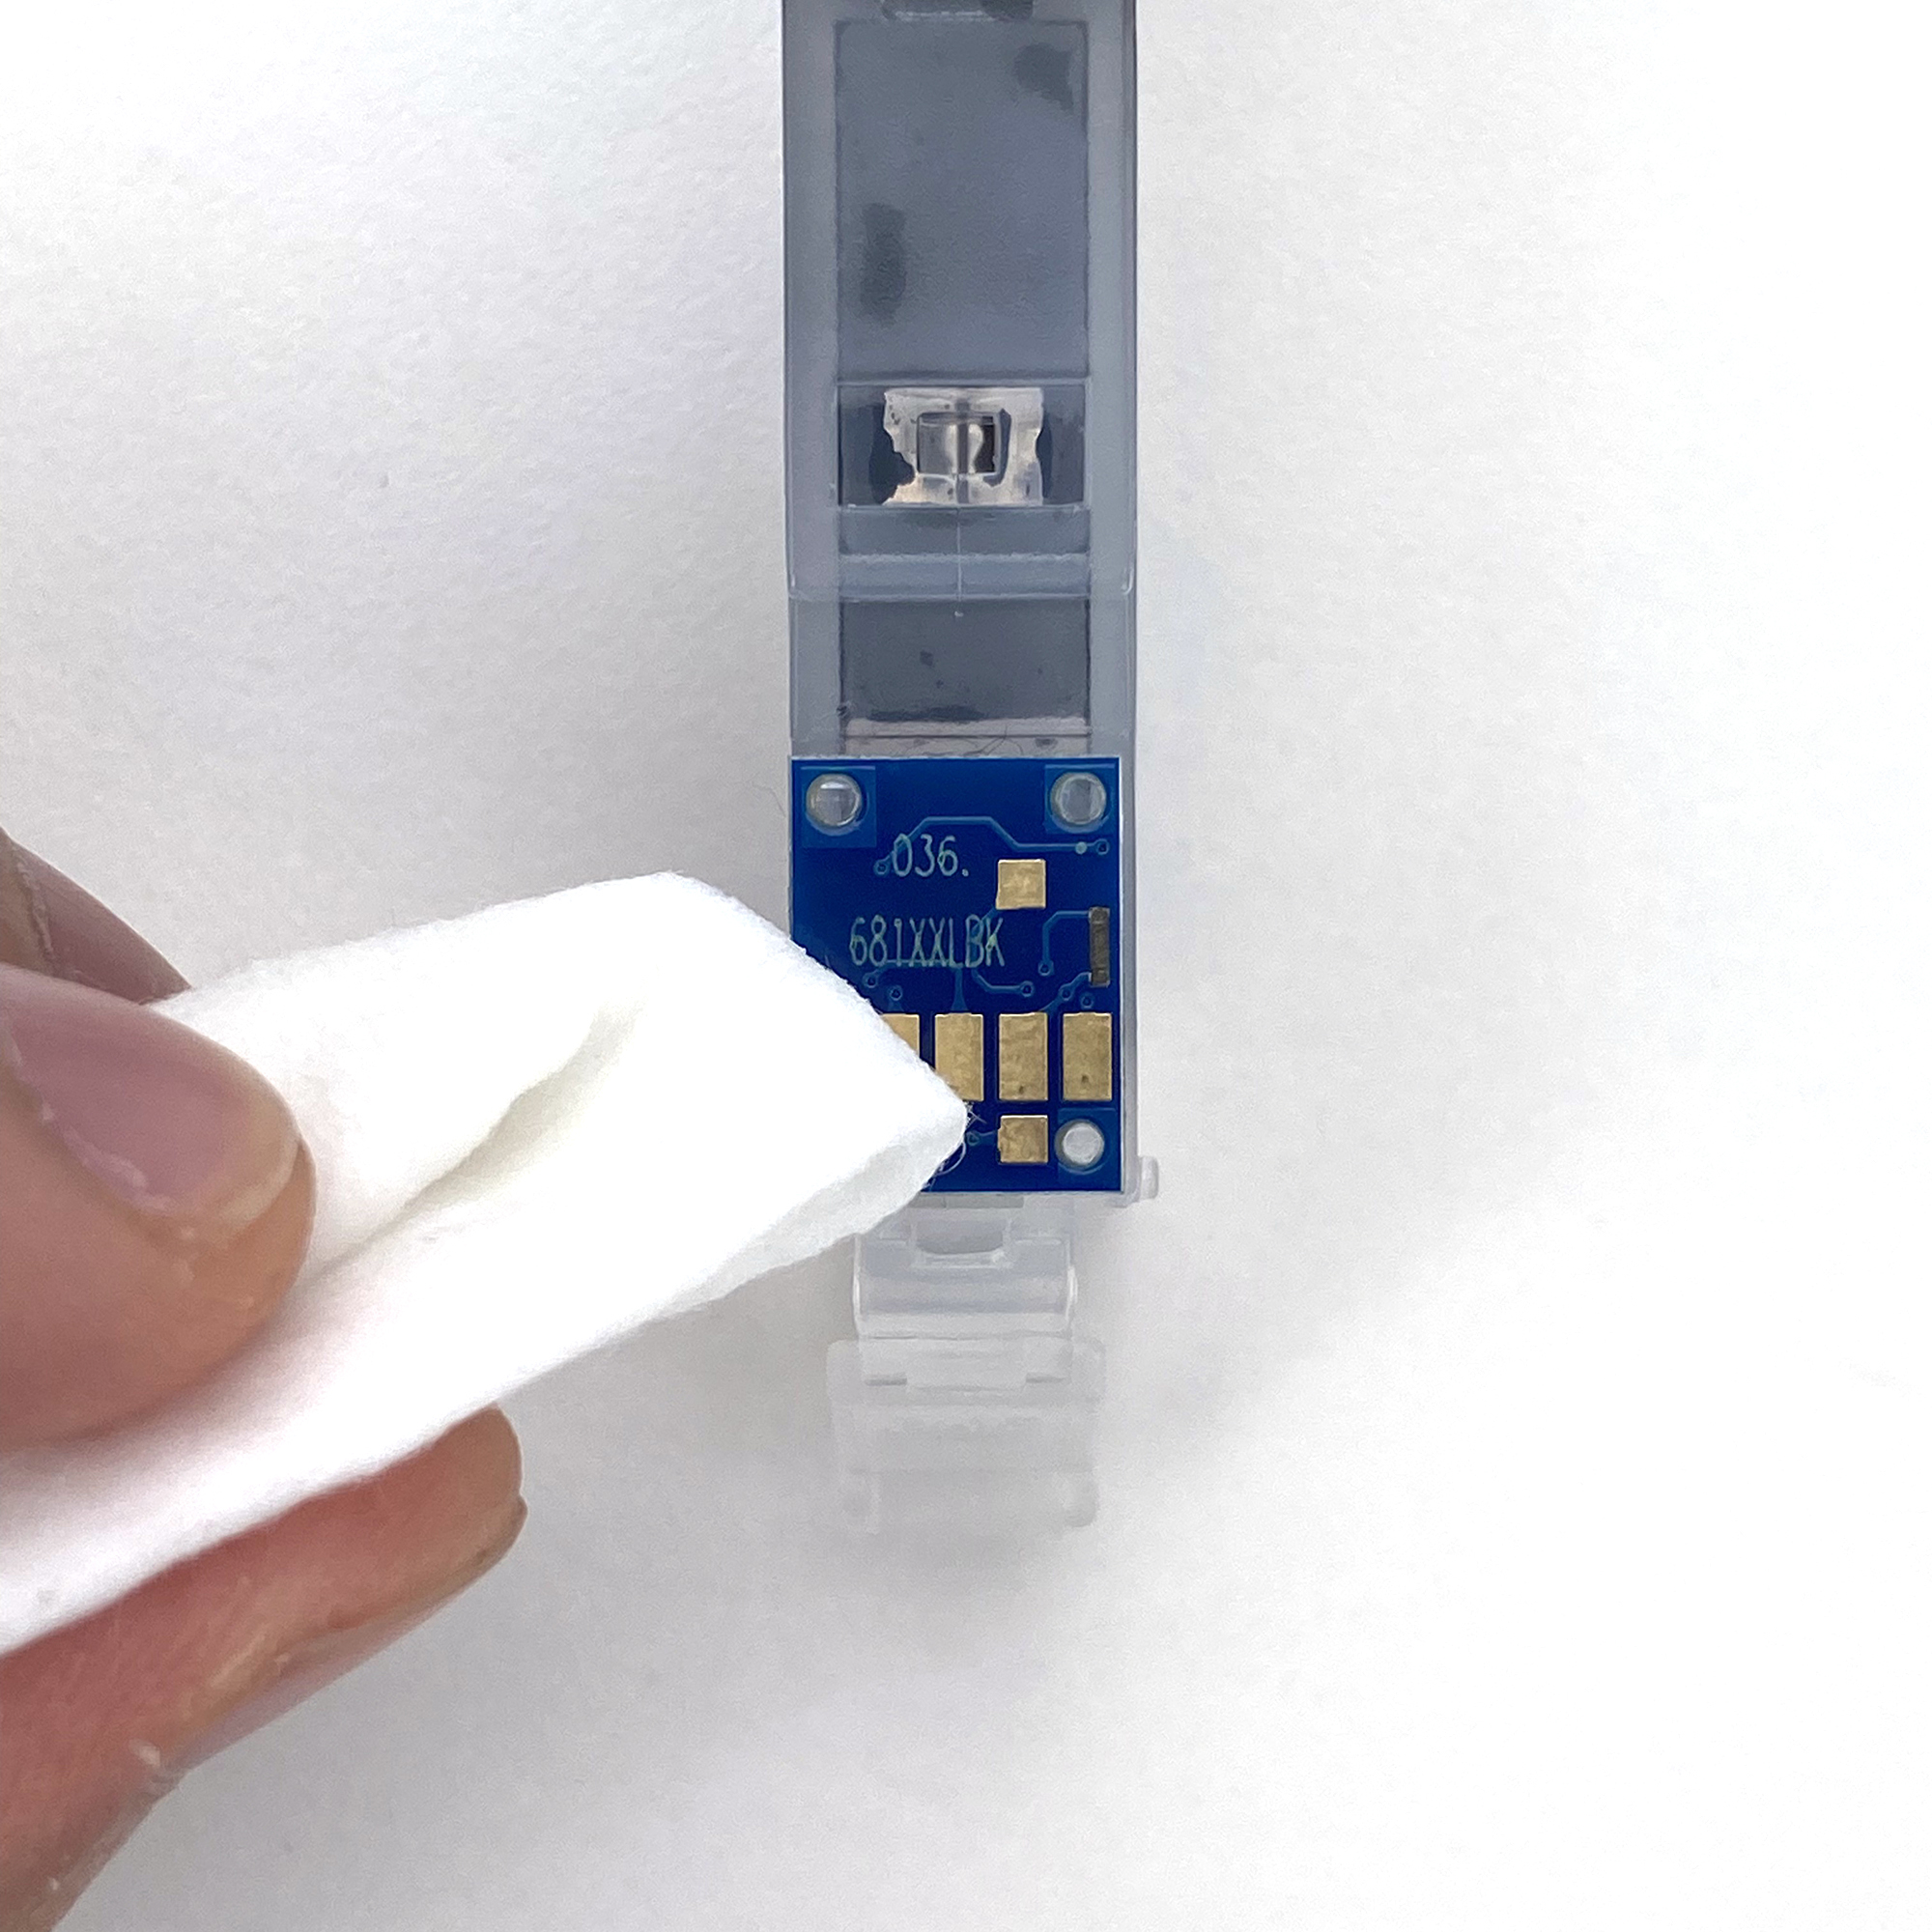
Gently wipe the chip with a lint free cloth to remove any obstruction or debris (Figure 3). Gently pull the tap on the front of the ink cartridge to help the ink cartridge fit into the printer properly.
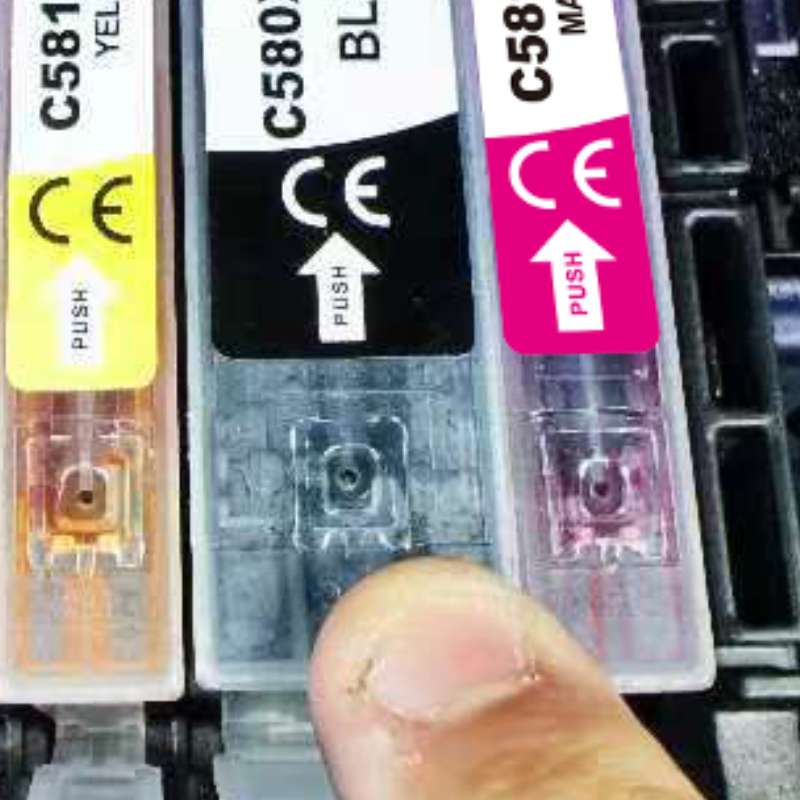
Reinstall the ink cartridges into the printer (Figure 4) and try the alignment process again.
If the error persists, it may be necessary to perform a cleaning cycle to improve the print quality (Figure 5) and complete the alignment process. Every printer is different, so please consult your printer's user manual for instructions on performing a cleaning cycle on your printer. If you cannot perform the cleaning cycle, or if the alignment fails even after performing the cleaning cycle, please make sure the scanner glass is clean and free from fingerprints or debris (this is only available on certain models). If these steps do not allow the printer to align the ink cartridges, you will need to return the ink cartridges to the place of purchase.

If you encounter an error message stating that "The following ink tank(s) cannot be recognized" (Figure 1), please try the following steps as possible solutions to resolve the problem.

Firstly, remove the cartridge that caused the error from the cradle. When you open the printer lid, you will see that the cartridge that is not being recognized does not have a red light in front of it. Gently push out on the tab on the front of the cartridge. Reinstall the ink cartridge (Figure 2) and you should hear it "click" into place. If the ink cartridge is still not being recognized, remove the ink cartridge from the cradle again. Confirm that there is a chip intact and in the correct location.
If the chip is missing (Figure 3), you should return the cartridge to the place of purchase. If the chip is in place, you may need to clear it from any kind of obstruction or debris as this could be the cause of the error.
To clean the chip, you can use a pencil eraser. Brush the chip lightly with the eraser to remove any potential obstruction or debris. Or you can use any type of lint free cloth to gently wipe the chip (Figure 4), again to remove any type of obstruction or debris. Once this is complete, replace the ink cartridge in the cradle. If the problem persists, you need to reset the printer. This can be done by turning off the computer and the printer with the cartridge installed. Unplug your printer and let your machines off for 2 minutes. Restart the printer and computer, and try printing again. If you tried both steps and got the same error, there is most likely an electrical problem with the cartridge and you should return the cartridge to where you purchased it.

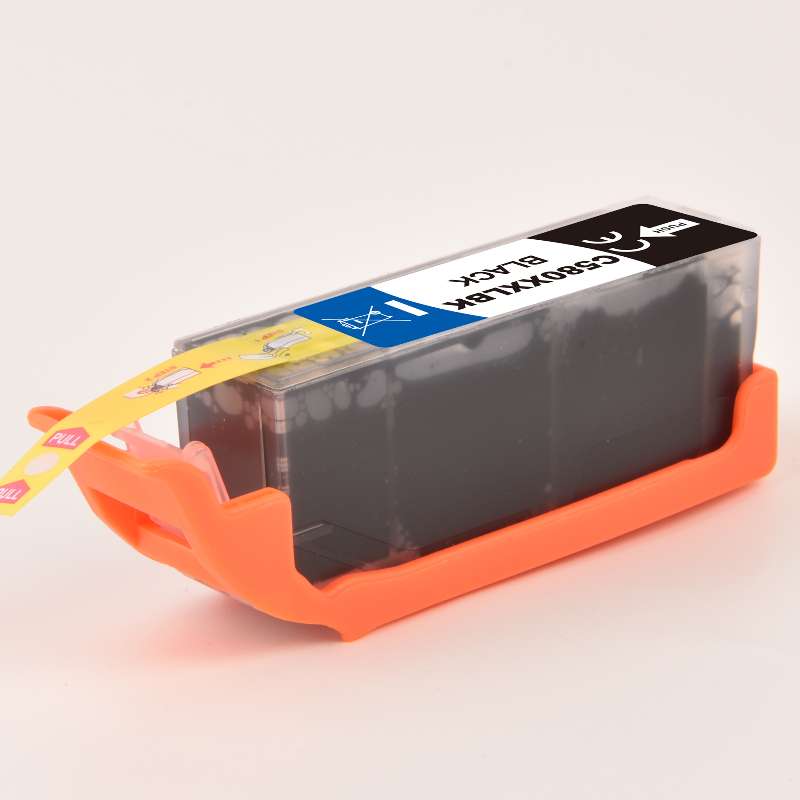
Make sure that the cartridge pictured matches the cartridge in your hand or installed in the printer (Figure 1). Verify that the printer you are using is listed in the printer compatibility table as a suitable printer for the cartridge you are trying to install. If One of these Two criteria do Not match, you have most likely received the incorrect ink cartridge for the printer. Please visit our Printer Compatibility page to assure the cartridge required for your printer. After confirming that your ink cartridge is correct for your printer, the first step is to remove the pull tab and clip from the cartridge. If it does not "click" into place, there is an easy solution to this problem.

Gently pull the tap on the front of the cartridge (Figure 2). Reinstall the cartridge and you should hear it "click" into place. Follow any screen prompts that may appear. If your cartridge is still not fitting into the printer, you will need to confirm that the correct cartridge is supplied to your printer.
If you have printed a document and are not satisfied with the print quality, first make sure you have removed the pull tab on top of the cartridge (Figure 1).

if you have removed the pull tab and the print quality is still not satisfactory, you may need to perform a cleaning cycle to improve print quality. On the printer's control panel, press the "Settings" button (Figure 2) and press "OK".

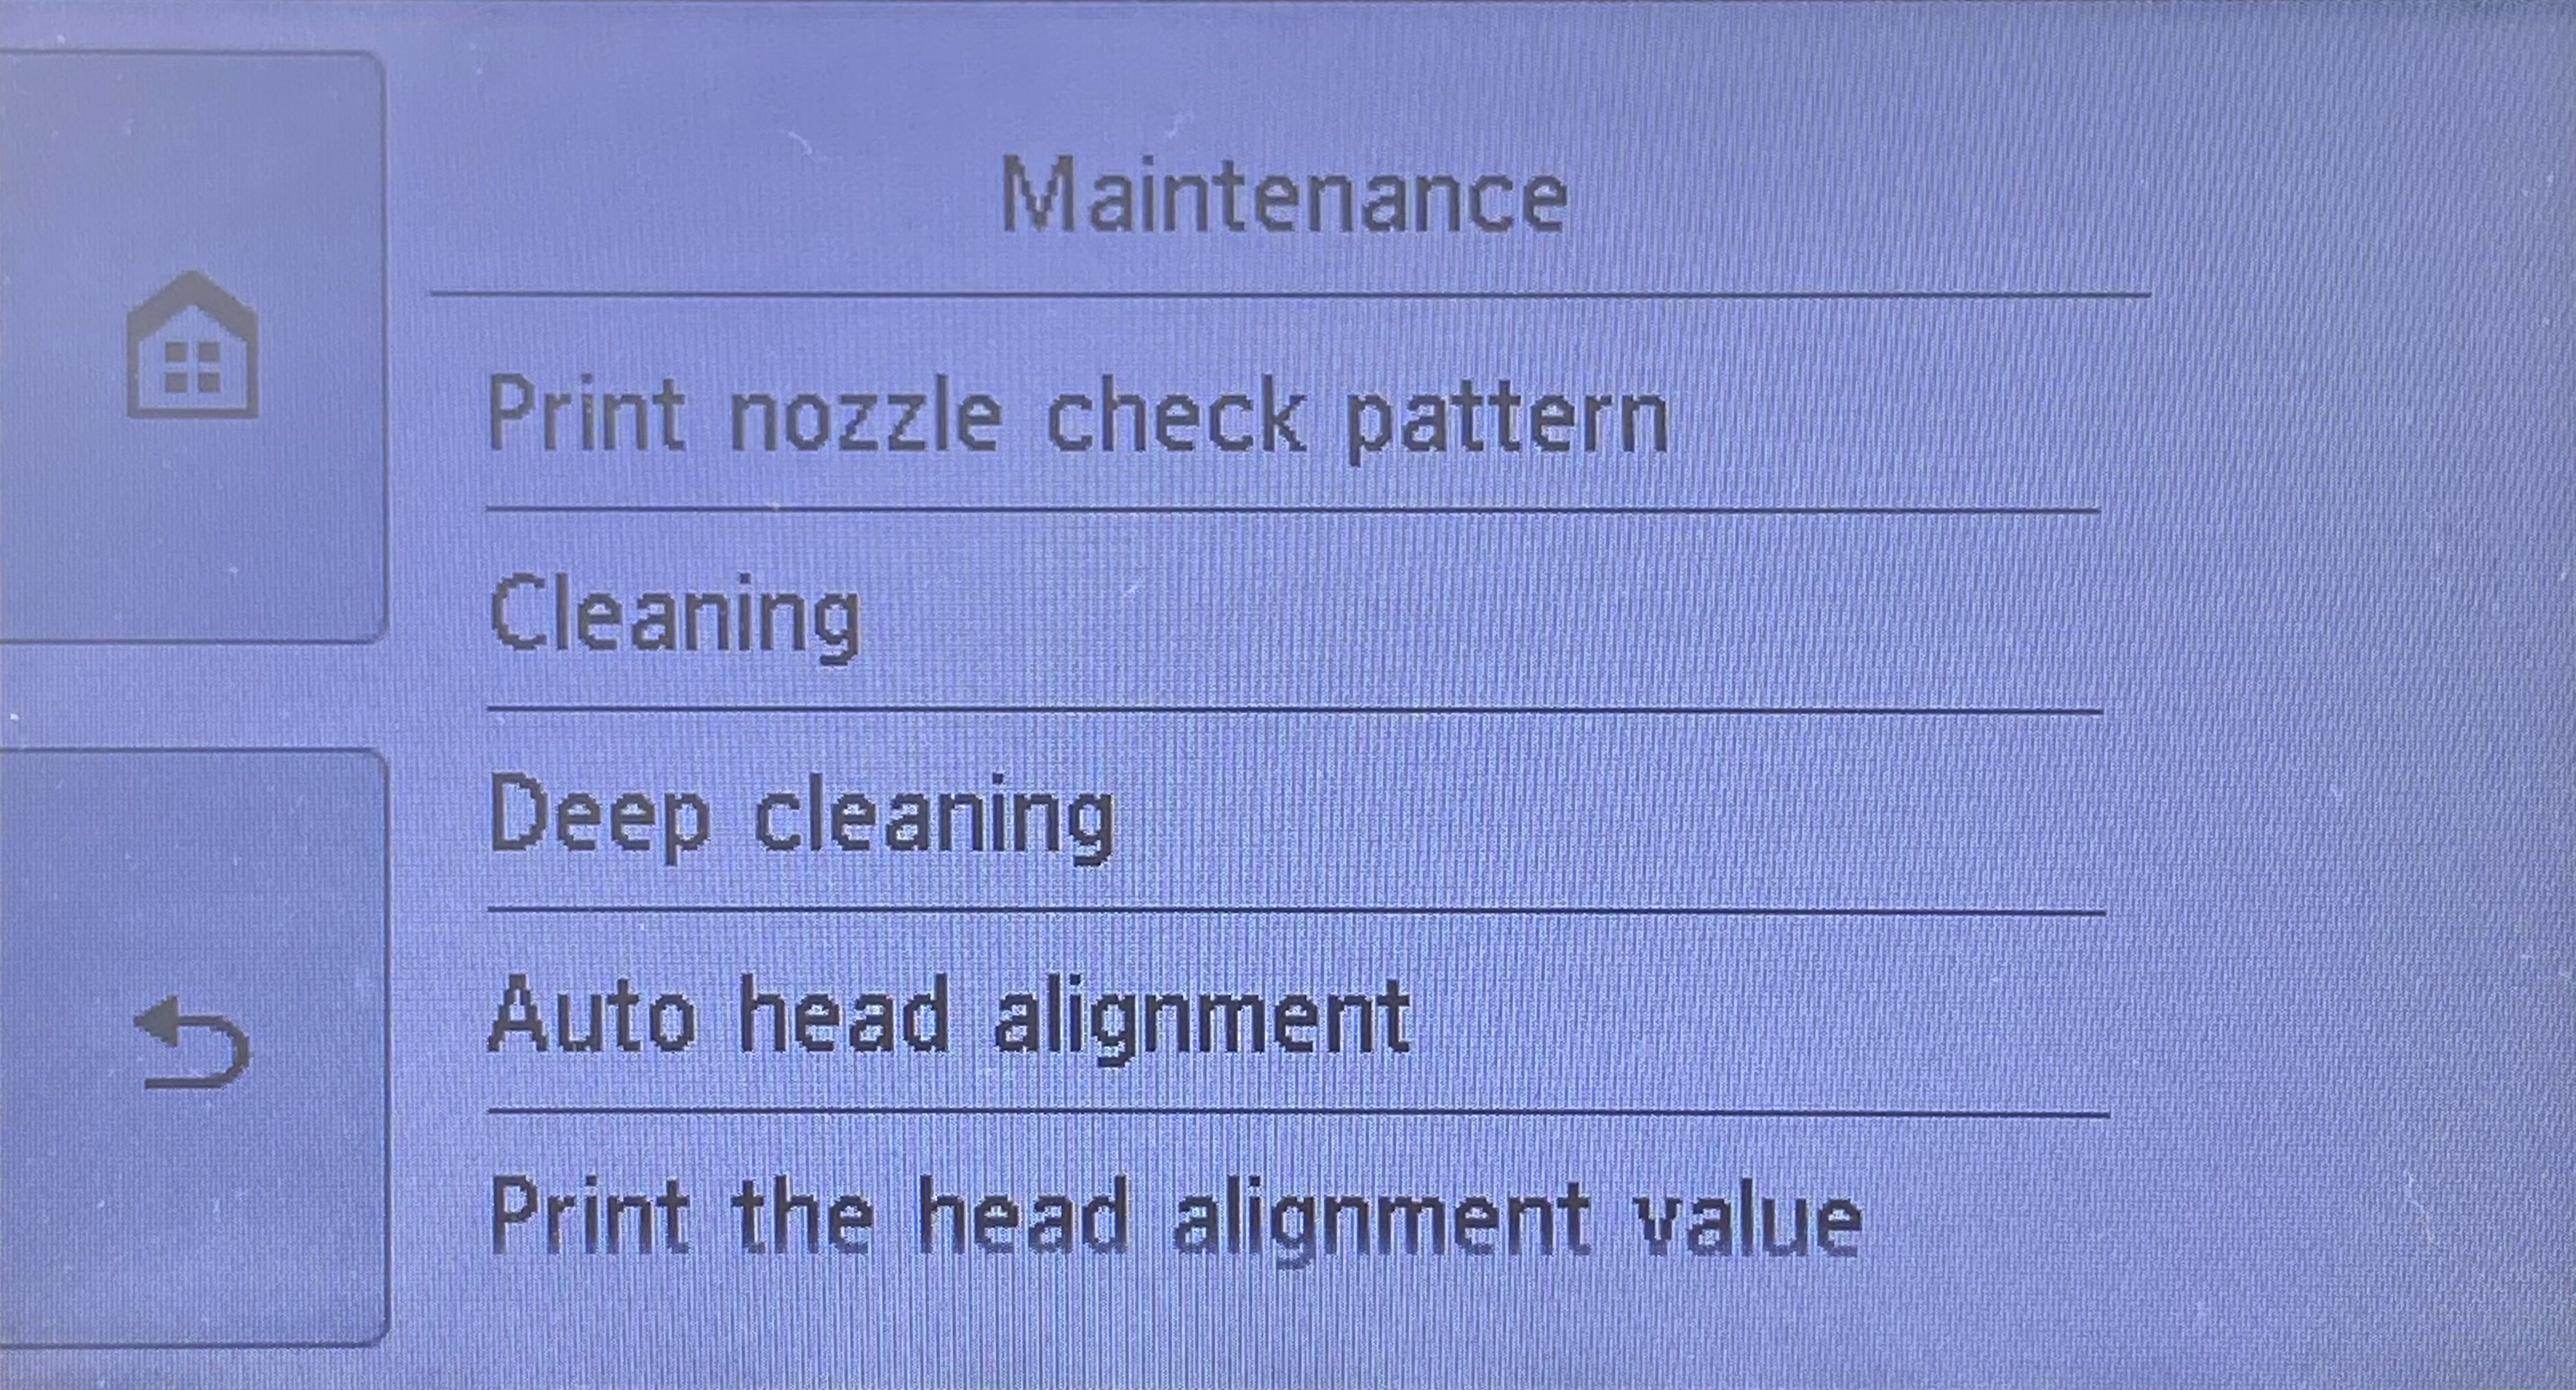
Then scroll to "Maintenance" and press "OK" (Figure 3).

Scroll to "Cleaning" and press "OK" (Figure 4). Select "Yes" and press "OK". Follow any on-screen prompts that may appear. After cleaning, a test page will be printed to let you confirm the status. If the print on your test page is satisfactory, you may return to the document you wish to print and resume printing. If the quality on the test page is still unsatisfactory, you can choose to perform a Deep Cleaning. Please be aware that cleaning the printhead does consume ink;and therefore, it should only be done when necessary. If the test page is not satisfactory after a cleaning cycle, you may need to replace the inkjet cartridges.
If you receive an error message stating that "The printer was unable to detect or read the alignment page" (Figure 1), this may indicate that the printer is not properly recognizing the cartridge.
Remove the cartridge from the printer and locate the chip. Make sure the chip is in place (Figure 2). Please remove any obstruction or debris as this may prevent the alignment from completing.
Gently wipe the chip with a lint free cloth to remove any obstruction or debris (Figure 3). Gently pull the tap on the front of the ink cartridge to help the ink cartridge fit into the printer properly.
Reinstall the ink cartridges into the printer (Figure 4) and try the alignment process again.
If the error persists, it may be necessary to perform a cleaning cycle to improve the print quality (Figure 5) and complete the alignment process. Every printer is different, so please consult your printer's user manual for instructions on performing a cleaning cycle on your printer. If you cannot perform the cleaning cycle, or if the alignment fails even after performing the cleaning cycle, please make sure the scanner glass is clean and free from fingerprints or debris (this is only available on certain models). If these steps do not allow the printer to align the ink cartridges, you will need to return the ink cartridges to the place of purchase.
If you encounter an error message stating that "The following ink tank(s) cannot be recognized" (Figure 1), please try the following steps as possible solutions to resolve the problem.
Firstly, remove the cartridge that caused the error from the cradle. When you open the printer lid, you will see that the cartridge that is not being recognized does not have a red light in front of it. Gently push out on the tab on the front of the cartridge. Reinstall the ink cartridge (Figure 2) and you should hear it "click" into place. If the ink cartridge is still not being recognized, remove the ink cartridge from the cradle again. Confirm that there is a chip intact and in the correct location.
If the chip is missing (Figure 3), you should return the cartridge to the place of purchase. If the chip is in place, you may need to clear it from any kind of obstruction or debris as this could be the cause of the error.
To clean the chip, you can use a pencil eraser. Brush the chip lightly with the eraser to remove any potential obstruction or debris. Or you can use any type of lint free cloth to gently wipe the chip (Figure 4), again to remove any type of obstruction or debris. Once this is complete, replace the ink cartridge in the cradle. If the problem persists, you need to reset the printer. This can be done by turning off the computer and the printer with the cartridge installed. Unplug your printer and let your machines off for 2 minutes. Restart the printer and computer, and try printing again. If you tried both steps and got the same error, there is most likely an electrical problem with the cartridge and you should return the cartridge to where you purchased it.
Make sure that the cartridge pictured matches the cartridge in your hand or installed in the printer (Figure 1). Verify that the printer you are using is listed in the printer compatibility table as a suitable printer for the cartridge you are trying to install. If One of these Two criteria do Not match, you have most likely received the incorrect ink cartridge for the printer. Please visit our Printer Compatibility page to assure the cartridge required for your printer. After confirming that your ink cartridge is correct for your printer, the first step is to remove the pull tab and clip from the cartridge. If it does not "click" into place, there is an easy solution to this problem.
Gently pull the tap on the front of the cartridge (Figure 2). Reinstall the cartridge and you should hear it "click" into place. Follow any screen prompts that may appear. If your cartridge is still not fitting into the printer, you will need to confirm that the correct cartridge is supplied to your printer.
If you have printed a document and are not satisfied with the print quality, first make sure you have removed the pull tab on top of the cartridge (Figure 1).
if you have removed the pull tab and the print quality is still not satisfactory, you may need to perform a cleaning cycle to improve print quality. On the printer's control panel, press the "Settings" button (Figure 2) and press "OK".
Then scroll to "Maintenance" and press "OK" (Figure 3).
Scroll to "Cleaning" and press "OK" (Figure 4). Select "Yes" and press "OK". Follow any on-screen prompts that may appear. After cleaning, a test page will be printed to let you confirm the status. If the print on your test page is satisfactory, you may return to the document you wish to print and resume printing. If the quality on the test page is still unsatisfactory, you can choose to perform a Deep Cleaning. Please be aware that cleaning the printhead does consume ink;and therefore, it should only be done when necessary. If the test page is not satisfactory after a cleaning cycle, you may need to replace the inkjet cartridges.